PiControl
PiControl is a powerful app which enables you to control your Raspberry Pi remotely from any web browser.
This page gives you an overview of the PiControl App.
PiControl
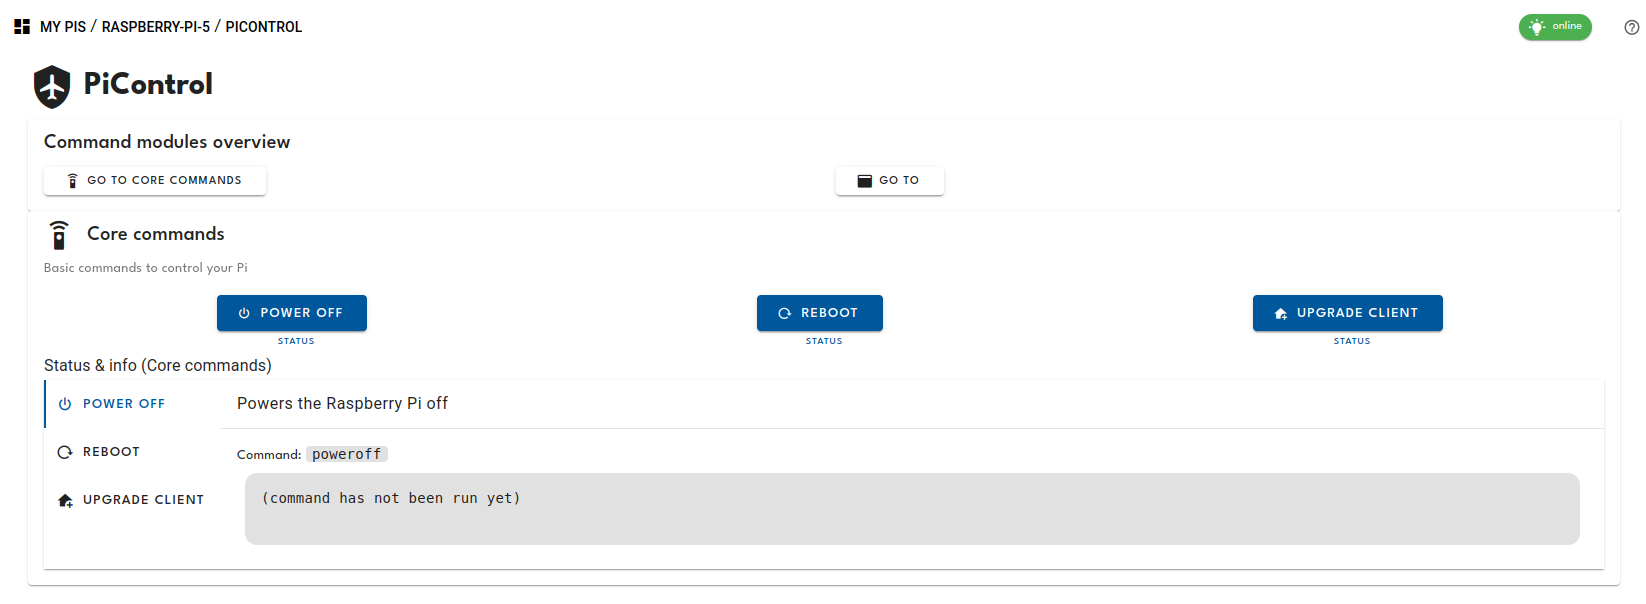
You’ll notice that, by default, three commands are included and immediately available for your Raspberry Pi. Namely, with PiControl, you can power off your Raspberry Pi, reboot your Raspberry Pi, and upgrade the PiCockpit Client.
Customizing PiControl
What makes PiControl particularly useful is that it’s also customizable.
You can easily and securely define your own commands by editing JSON files on your Raspberry Pi.
So here are instructions are for users who do not have experience with the command line.
If you know how to use the command line, you might find it easier and faster to just create the file and edit it with Nano or Vim.
If not, then we’ll go through the steps here.
First, you need to open the file browser in super user mode (this step keeps your PiCockpit PiControl configuration files safe from any user or application wanting to tamper with them).
Click on Raspberry Pi OS Menu, and here click the “Run…” command.
A box will appear that reads “Enter the command you want to execute:”. Type in sudo pcmanfm and click OK.
A new window opens, showing you the contents of the /home/<user> directory.
The warning symbol at the top left of the screen indicates that you are in Super User mode. At the top right, you want to navigate to the following directory:
/etc/picockpit-client/apps/com.picockpit/picontrol/modules
Right-click into the empty area next to the existing files, and select “New File…”.
Call the new file "ssh-server.json".
Now, you need to right-click the new file, to bring up the context menu. Choose “Geany”.
You can now see the new file we just created. However, at the moment, it’s empty.
Let’s create two new commands, one for shutting down the SSH server service, and one for starting it. Enter the following into the text field in Geany:
{
  "name": "SSH commands",
  "icon": "mdi-ssh",
  "handle": "ssh",
  "description": "Control the SSH server",
  "commands": {
    "ssh-stop": {
      "name": "SSH Server off",
      "icon": "mdi-server-minus",
      "description": "Shuts the SSH service down",
      "confirm": true,
      "user": "root",
      "command": ["service", "ssh", "stop"]
    },
    "ssh-start": {
      "name": "SSH Server on",
      "icon": "mdi-server-plus",
      "description": "Starts the SSH service",
      "user": "root",
      "command": ["service", "ssh", "start"]
    }
  }
}
At this point we should save the file. You can do this from Geany’s file menu, for example, by selecting Save or by pressing Ctrl + S.
At this point our new commands have not appeared in the web interface yet.
You need to restart the PiCockpit Client for this.
Click on the “Run…” command in the Raspberry Pi OS menu once more and type sudo service picockpit-client restart into the window before clicking OK:
Now take a look at your PiControl web interface:
If you’ve typed everything correctly, the new SSH server commands will appear. If you have made a mistake in your JSON file (for example, if you’ve forgotten a curly bracket), PiCockpit will simply ignore the “broken” file.
You can now try the commands.
Congratulations! You’ve just created your very own set of commands which you can run from the web interface.
Stay on the page while you run commands. The status will be cleared if you navigate away. To determine whether the SSH server is running, you could build a test on our PiDoctor App.
PiControl is solely for executing remote actions on your Raspberry Pi.
Remember to restart the PiCockpit Client when you add new commands or update commands.
You can also remove commands you don’t want to have. For example if you want to remove the capability to shut your Raspberry Pi down remotely, you can edit the core.json file.
PiControl’s .JSON Syntax
The file configures a new module for PiControl.
As already mentioned, it has a .JSON syntax. Therefore, you need to make sure that you open and end with curly braces in a correct fashion, as presented in the example above.
There is a head, which configures the module itself, and the commands (in the “commands” section). They share some common entries:
name
The “name” entries are human readable names which are shown to you in the web-interface.
icon
The “icon” entries are optional to decorate your buttons and module. These are Material Design Icon names, for example “mdi-ssh”.
You can check out a full list of Material Design Icons here. Simply copy the name of the icon (including the mdi- in the beginning).
description
The “description” entries are optional and allow you to add a bit more information for the command or module.
handle
The “handle” entry is explicit for the module, and has to be unique amongst the modules. In the case of the commands, the handle is implicit. “ssh-stop” and “ssh-start” are the two handles I’ve used for the commands in my example.
You can choose anything as a handle, as long as it does not include the characters “/”, “+”, “$”, “*”. I recommend to stick to basic downcase ASCII characters, and using the “-“. The handle is required.
Your file can, by the way, have a different file name than the handle – I encourage you to use at least related names for the file name and the handle, so you can easily identify the module .JSON file on your hard drive.
The commands go into the “commands” block, and have additional configuration possibilities:
confirm
If “confirm” is present, and set to true, the PiControl web interface will show a confirmation dialog before actually running the command. This is useful for making sure “dangerous” commands don’t execute by an accidental tap or click.
user
If “user” is present, the command will run as this particular user (as root in our example, to ensure that we have sufficient privileges).
PiControl will run commands as user “pi” by default. You can also set it to other users with less privileges than “pi“.
If you try to run GPIO commands, or play videos using omxplayer, you might have to give your new user additional capabilities. The user pi has these required privileges by default. Usually these privileges are set by adding the user to a special group.
command
This is the actual command which you should run on your Raspberry Pi. Note that you have to replace the spaces in the command compared to as you would run it on the command line. For example,
service ssh start
should be written as:
["service", "ssh", "start"]
PiControl also supports chaining a sequence of commands (e.g. the usual apt-get update, apt-get upgrade sequence). Check out core.json for an example of how that is being done.
Additional Help
If you have any questions or run into any issues, do not hesitate to contact us and we’ll help you get PiControl up and running.